Picking the right typeface combinations shapes how people read your name, title, and contact details at a glance. When you build a minimalist professional identity, every letter carries weight. Too many styles create visual noise. Too little contrast makes everything blend together. The goal is a quiet, readable system that looks intentional on a screen and on paper.
Font pairings for minimalist professional identity means selecting two, sometimes three, typefaces that share clean lines, balanced proportions, and clear hierarchy. You use this approach when designing business cards, email signatures, letterheads, or a personal brand site. The pairing handles headings, body text, and small details without competing for attention. It keeps your branding consistent and your message easy to scan.
How do you choose two fonts that actually work together?
Start with one reliable workhorse for body copy. Look for open counters, steady x-heights, and multiple weights. Then pick a second face for names or section titles that contrasts just enough. A geometric sans paired with a humanist sans often feels too similar. A sharp serif next to a neutral sans creates structure without adding visual clutter. If you want a practical starting point, reading through notes on selecting fonts for a minimalist brand card can help you narrow options before testing them side by side.
Which combinations keep a clean, professional look?
Minimalist branding relies on restraint. You do not need decorative alternates or heavy display faces. Stick to pairings that maintain consistent spacing and readable letterforms at small sizes.
Sans-serif and serif pairings
A neutral sans-serif for contact details paired with a refined serif for your name creates quiet contrast. For example, Inter handles small text well, while Playfair Display adds structure to headings without feeling ornate. When you lay out a card, this approach keeps the layout breathable. You can see how a sans-serif and serif duo for minimalist business cards balances readability with a polished tone.
Matching weights and x-heights
Contrast comes from style, not size alone. Pick faces with similar x-heights so lines align naturally. Use regular or medium weights for body text, and reserve bold or semi-bold for names and titles. Avoid pairing two heavy faces. The page will feel dense, and the minimalist intent disappears.
What mistakes make minimalist typography look cluttered?
Most layout problems come from small choices that add up. Using three different families on one card breaks visual harmony. Mixing condensed and extended widths creates uneven spacing. Relying on all caps for body text reduces readability and forces the eye to work harder.
Another common error is ignoring tracking and leading. Tight letter spacing on small type makes characters collide. Loose spacing on short lines leaves awkward gaps. Adjust tracking slightly for uppercase headings, and keep line height around 1.2 to 1.4 for contact details. If you are building a new company identity, reviewing minimalist business card typography for startups shows how early-stage brands avoid these traps while keeping production costs low.
How can you test your pairings before printing or publishing?
Print a draft at actual size. Screen rendering hides spacing issues that paper reveals immediately. Check how the fonts look at 8 pt, 9 pt, and 10 pt. Read the text from arm’s length. If you squint to find the phone number or email, increase the weight or adjust the tracking.
Test on both light and dark backgrounds if your identity uses inverted layouts. Export a PDF and view it on a phone. Mobile screens compress spacing, and a pairing that looks fine on a desktop can feel cramped on a small display. Always verify legibility at the smallest size you plan to use.
What should you finalize before going live?
- Stick to two typefaces maximum for cards and stationery.
- Assign one face to headings and one to body text, then keep that rule consistent.
- Match x-heights and avoid mixing extreme widths or contrasting styles that fight for attention.
- Set body text between 8 pt and 10 pt with 1.2 to 1.4 line spacing.
- Add slight tracking to uppercase names, but leave lowercase body text at default spacing.
- Print a physical proof and check readability from a normal viewing distance.
- Save a simple style sheet with font names, weights, sizes, and color codes for future projects.
Pick your pair, test it on paper, and lock the settings before you order prints or update your website. Small adjustments now save reprints and keep your professional identity consistent across every touchpoint.
Download Now Modern Minimalist Typography for Corporate Cards
 Masterful Font Pairings for Minimalist Cards
 Minimalist Typography for Startup Branding
 Selecting Fonts for Minimalist Brand Cards
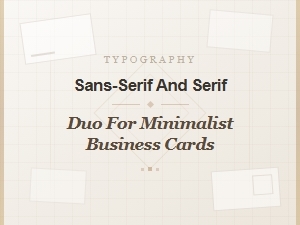 A Minimalist Pairing of Serif and Sans-Serif
 A Guide to Classic Typography for Business Cards